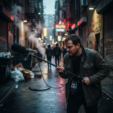
Capturing clear, intelligible audio isn’t always as simple as hitting “record.” From interviews conducted in a bustling café to field recordings in windy conditions, environmental noise can quickly degrade sound quality, making voices unintelligible or masking crucial details. This guide provides practical strategies for achieving high-quality audio recordings even in acoustically challenging settings, ensuring your message comes across loud and clear.
Understanding the Enemy: Common Noise Pollutants
Before you can fight noise, you need to identify it. Common environmental audio pollutants include:
- Reverberation: Echoes and reflections in hard, empty rooms (like conference halls or tiled bathrooms) make speech sound distant and muddy.
- Background Chatter: Conversations, music, and general hubbub in public spaces.
- Mechanical Noise: Air conditioners, refrigerators, computer fans, traffic outside, and even the subtle hum of electrical equipment.
- Wind Noise: A significant challenge outdoors, often sounding like a low rumble or distortion.
- Handling Noise: Sounds created by physically touching or moving the microphone or its cable.
Each type of noise requires a slightly different approach to minimize its impact on your recording.
Strategic Placement: The First Line of Defense
The most effective way to combat unwanted noise is to prevent it from entering your microphone in the first place. This often boils down to strategic microphone placement:
- Get Closer to Your Subject: The “inverse square law” dictates that sound intensity decreases rapidly with distance. Positioning your microphone as close as comfortably possible to your sound source (a speaker’s mouth, an instrument) will make their voice significantly louder relative to background noise. Aim for 6-12 inches as a good starting point for speech.
- Direct the Microphone: Most microphones are directional, meaning they pick up sound primarily from one direction. Understand your microphone’s “polar pattern” (e.g., cardioid for a heart-shaped pickup, supercardioid for a tighter focus). Point the microphone directly at your sound source and away from the main noise sources. For example, if recording a speaker in a noisy room, position the mic between the speaker and the biggest source of noise, with the mic’s “dead spot” facing the noise.
- Utilize Natural Barriers: Walls, furniture, or even your own body can block or absorb some sound. Position your subject and microphone to maximize these natural shields. Avoid placing microphones near reflective surfaces (bare walls, windows) which can worsen reverberation. If possible, consider moving to a quieter corner of the room or moving objects around to dampen reflections.
Essential Tools and Techniques for Noise Reduction
Beyond placement, several tools and techniques can drastically improve your recordings:
- Wind Protection (Outdoors): For outdoor recordings, a high-quality foam windscreen or, even better, a “dead cat” furry cover is indispensable. These physically diffuse wind hitting the microphone diaphragm, preventing distortion. Even a light breeze can cause significant wind noise in an unprotected microphone.
- Microphone Type Selection: Dynamic microphones are generally less sensitive and more robust, making them good choices for loud environments or handheld use without picking up excessive background noise. Condenser microphones, while offering higher fidelity, are more sensitive and might pick up too much ambient sound in noisy settings. Experiment with what works best for your specific situation.
- Pop Filters/Microphone Grilles (Indoors): While primarily for reducing “plosives” (harsh P and B sounds), a pop filter can also offer a small degree of protection against breath noise if placed correctly.
- Isolate Vibrations: Use a shock mount to decouple the microphone from the stand or camera. This prevents vibrations from footsteps, handling, or bumps from traveling up the stand and into your recording. Even a soft surface to place your recorder on can help.
- Monitor Your Audio: This is perhaps the most crucial step. Always wear headphones when recording, especially in challenging environments. Headphones allow you to hear exactly what the microphone is picking up – including unwanted noise – and make real-time adjustments to placement, gain levels, or technique. Don’t rely solely on visual meters; your ears are the ultimate judge of sound quality.
Addressing Privacy and Practical Limitations
When recording in public or semi-public spaces, always be mindful of privacy. In many jurisdictions, recording conversations without consent (even background conversations) can have legal implications. Inform participants if they are being recorded, especially for interviews or journalistic purposes. Practically, there will be limits to what you can achieve with basic equipment in extremely noisy environments. Sometimes, the best solution is to find a quieter location altogether, or to accept that some ambient noise is unavoidable and potentially adds to the authenticity of the recording (within reason).
By understanding common noise sources, employing smart microphone placement, and utilizing simple accessories, you can dramatically improve the clarity and quality of your audio recordings, even in the most challenging environments.